Monday, September 13, 2010

White Chocolate Chip/Macadamia Nut Cookies


I have been craving these cookies for almost a month now and I finally got around to baking some last week.

I took the recipe from a baking cookbook that my grandma gave me a couple of years ago. I had to play around with it a little to make it suit my tastes.

I normally use the recipe off of the bag of Ghiradelli White Chocolate Chips but I only had Toll House white chocolate chips this time and their recipe seemed a little bit strange to me.

I'll share the recipe as it was originally but I'll let you know how I modified it too.

From the All New Bake Sale Cookbook

1 package (12 ounces) white chocolate chunks, divided (I used two bags of white chocolate chips)
1 3/4 cups flour
1 1/2 flake coconut, toasted (I left the coconut out completely)
3/4 teaspoon baking soda
1/4 teaspoon salt
1/2 cup (1 stick) butter or margarine, softened
1/3 cup firmly packed brown sugar
1 egg
1 teaspoon vanilla
1 cup chopped macadamia nuts

Heat oven to 375F

Microwave 1 cup of the chocolate chinks in microwaveable bowl on high 2 minutes until almost melted. (I used 1 whole bag for this step) Stir until chocolate is completely melted; cool slightly. Mix flour, coconut, baking soda and salt in medium bowl; set aside.

Beat butter and sugar in large bowl with electric mixer on medium speed until light and fluffy. Add egg and vanilla; beat well. Stir in melted chocolate. Gradually beat in flour mixture. Stir in remaining chocolate chunks (I used the whole second bag) and nuts. Drop by heaping tablespoonfuls onto ungreased cookie sheets.

Bake 11 to 13 minutes or until just golden brown. Cool on cookie sheets 1 minute. Remove to wire racks and cool completely.

*Here's my $.02 worth of opinion about these cookies*

Honestly, they weren't my favorite. Not exactly a swing and a miss but not a home run either. The cookies were a little firmer than I like my cookies to be and they were chewy, except when warm. The Ghiradelli recipe doesn't have you melt any chocolate and add it to the batter. You just use the bag of chips. Maybe that made a difference. I won't know unless I try this recipe again and tweak it some more.

Tuesday, September 7, 2010

Paula's Pumpkin Bread


Have you ever read one of Paula Dean's magazines? I've got a subscription to it and it's one of those magazines that literally has me checking my mail box waiting for the next issue. A couple of weeks ago I got September/October issue in the mail. Of course there are lots of recipes for dinners for a nice cool evening, not that we get many of those is October/November in Florida but a girl can dream. There was also a section on taking your regular bread recipes and giving them a makeover. I was really interested in the recipe for pumpkin bread because I haven't found one that I loved. I really like the way that this bread turned out. It's a little dense and really moist and goes really, really well with a big spoonful of whipped cream on top of it.

I was going to link directly to the recipe on the magazine website but this issue isn't out on newsstands yet so it's not available on the website. (at least not that I could find) I did find another recipe from 2007 for pumpkin bread on the website but it differs from the one I've got. To make your life easier I'll go ahead and put it here but if you've got the magazine it's on page 77. I did tweak it a little bit to suit my taste but feel free to follow it to the letter, or not.

Pumpkin Bread from Sept/Oct issue of Cooking with Paula Deen 2010

Makes 2 loaves

Ingredients:

2 1/2 cups pumpkin puree
4 large eggs
1/2 cup vegetable oil
2/3 cup water
3 1/2 cups all purpose flour
3 cups sugar
2 teaspoons baking soda
1/2 teaspoon salt
1/2 teaspoon ground cinnamon
1/4 teaspoon ground nutmeg
1/4 teaspoon ground cloves

1. Preheat oven to 350 F. Spray 2 9x5 inch loaf pans with cooking spray.
2. In a large bowl, combine pumpkin, eggs, oil and water. In another large bowl combine flour, sugar, baking soda, salt, cinnamon, nutmeg and cloves. Gradually add flour mixture to pumpkin mixture, stirring until blended. Pour batter evenly into prepared pans. Bake 45 minutes or until a wooden pick inserted in center comes out clean. Cool in pans on a wire rack 15 minutes. Remove from pans and cool completely on wire rack.

*My thoughts*
I bet that you could use pumpkin pie spice instead of the three listed spices. I'd venture to guess that a teaspoon or a teaspoon and a half would be sufficient.

I thought that this recipe was really great. It wasn't crumbly or too dense. It was just perfect. I bet it'd be great with a cup of warm apple cider or something.

Hello Florida? It's Melissa. Would you mind cooling down some so that I could have this bread every day? I'd appreciate it and love you forever. Thanks.

Tuesday, August 31, 2010

Yummy in your tummy banana nut bread!


Last week a few of mine tweeted about the heavenly smell of banana bread baking in their kitchen (ahem, Kate!). I decided that I would make some banana bread as soon as I got home from work since I already had some ripe bananas that I needed to use. I ended up making five loaves of banana nut bread within a couple of days.

Here's my recipe:

Ingredients

2 cups all purpose flour
1 teaspoon salt
1 teaspoon baking soda
1 cup (4 sticks) butter or margarine
2 cups granulated sugar
2 cups mashed ripe bananas
4 eggs
1 cup (I don't actually measure) chopped walnuts

Directions

Preheat the oven to 350 degrees. Grease two 9x5 loaf pans

Sift the flour, salt and baking soda into a large bowl. In a separate bowl mix together the butter and sugar until smooth. Stir in the bananas, eggs and walnuts until well blended. Pour the wet ingredients in to the dry mixture and stir until just blended. Divide the batter between the two load pans.

Bake for 60-70 minutes in the preheated oven. Let the loaves cool in the pans for at least 5 minutes, then turn them out on to a cooling rack and let cool completely. Wrap in aluminium foil to keep in the moisture. Ideally, you'll want to refrigerate the loaves for a few hours before serving.(Pardon my uneven slicing. Apparently my cutting skills leave a little something to be desired.)
Let me share a little secret with you about my method for mashing the bananas. I used to enlist the help of my son because I didn't want banana all over my fingers. Since he's 9 now, he's not as willing to come help me with my banana situation. What I've discovered is that I can toss my bananas in the food processor and pulse it for a bit and ta da, I've got mashed bananas and minimal mess on me.

Additionally, you could use whatever nuts you prefer in this recipe. I usually have walnuts on hand so I tend to use them. You could use pecans or some other nut if you don't have walnuts, though. I also usually toss in a splash of vanilla extract but you don't have to add it if you don't want to. I happen to like vanilla in most baked goods.

Saturday, August 28, 2010

Have you ever had a loofah?


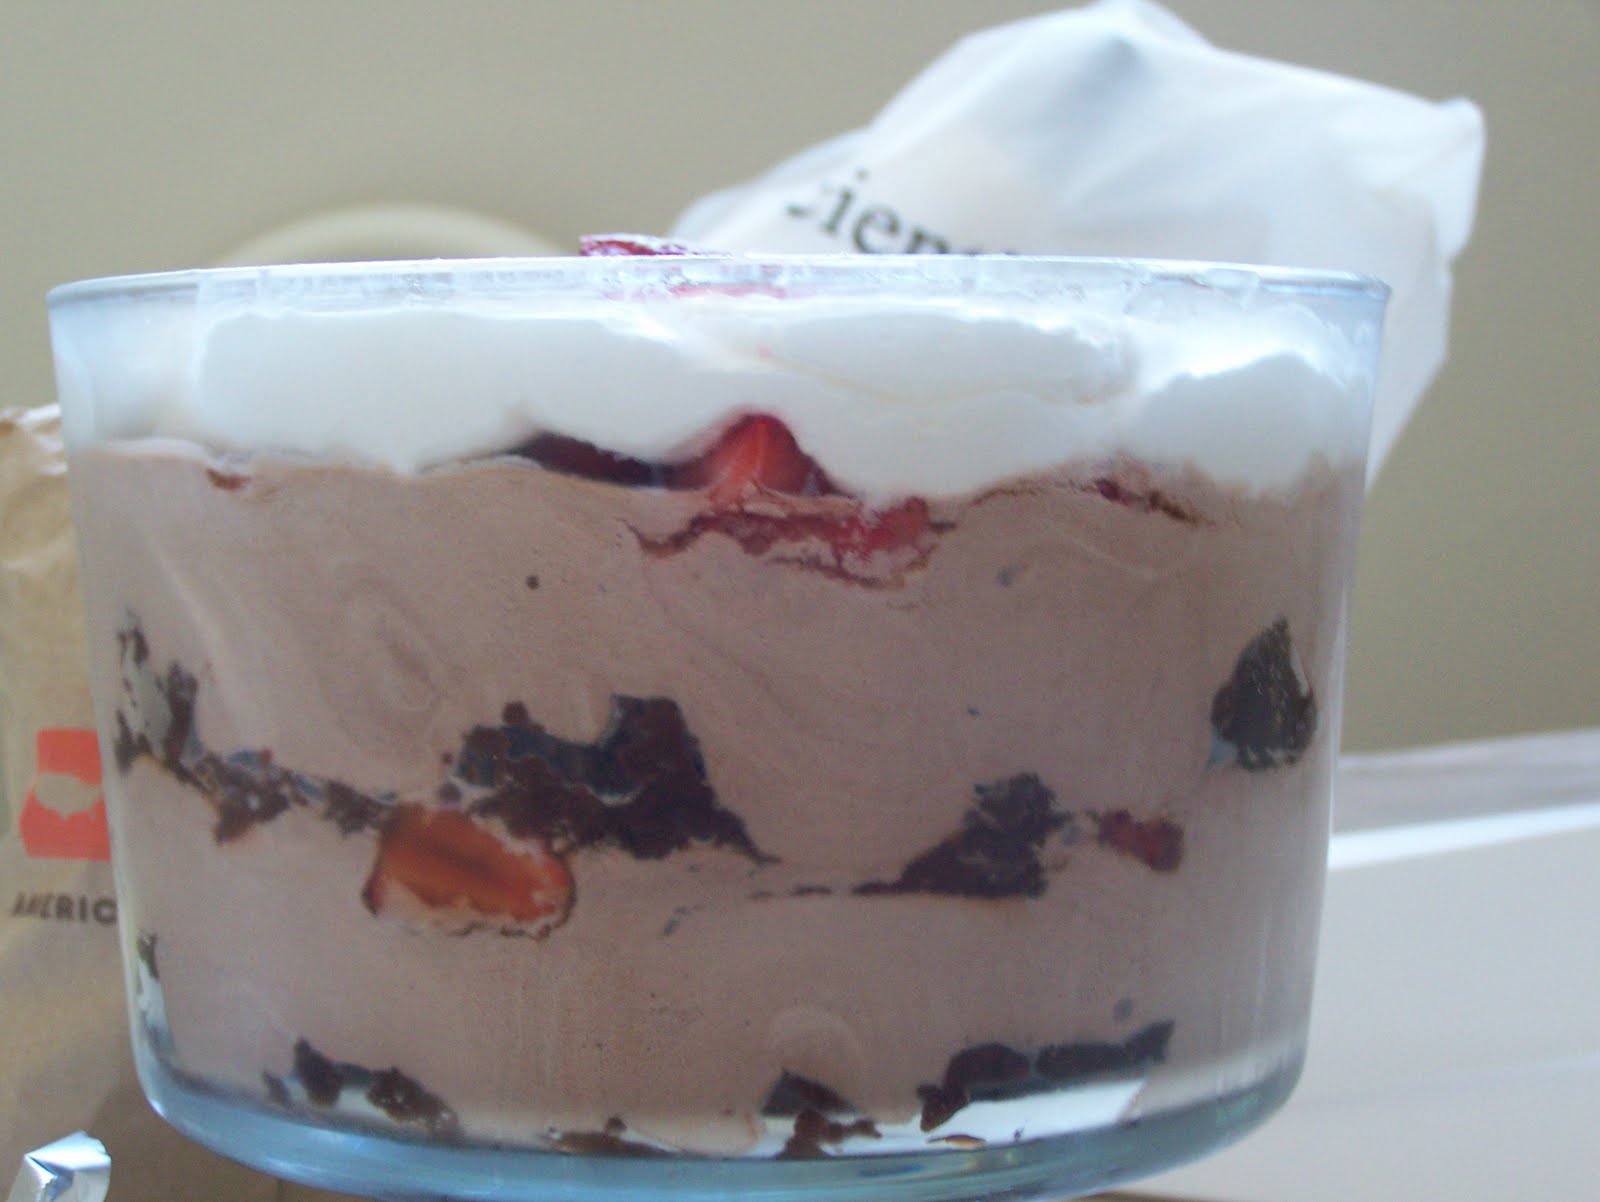
In our house this is called "The Loofah". Yes, I know that it's technically a trifle. The term loofah came about when I first made this my husband couldn't remember what it was called so he dubbed it "the loofah". And after ten years, it's stuck. All of the people at my work have taken to calling it the loofah as well. I've switched up the flavors in it a few times, always with positive results.
Here's how I put it together:
Ingredients:
1 family size box of instant chocolate pudding
1 box of brownie mix (plus the ingredients to make it according to box directions)
2 tubs of Cool Whip (thawed)
2 pints of strawberries
To make:
Mix up the brownies according to the package directions. I usually use the Betty Crocker bag brownies-I just use two of them to have enough brownies. While the brownies are cooling, prepare the chocolate pudding. Make the pudding according to the package directions and put it in the fridge and wait for it to set up. Take this time to slice up the strawberries. I just cut the tops of them and either slice/quarter them. Take the pudding out and add one tub of Cool Whip to the pudding. Fold the Cool Whip in to the pudding until it's all combined.
Get your pedestal bowl out. Take pieces of brownie and put them in the bottom of the bowl. Spoon some of the chocolate pudding mixture and put it on top of the brownies. Now put some of the strawberries on top of the pudding. I usually end up with two layers, with strawberries being on top. Take the second tub of Cool Whip and put it on the top of the strawberries. And that's it! I usually make it the night before I need it that way the pudding has time to sink in to the brownies and soften the strawberries some. I keep one or two strawberries whole to put on top for a garnish.
The last step would be to eat and enjoy!

Saturday, August 14, 2010

Whatcha' been up to?

This is part of what I've been up to this morning.

This is the second part of what I've been up to this morning.

This was the end result. And it's all gone now!


Sunday, August 1, 2010

Mini Cherry Cheesecakes


Friends-this is a miniature cherry cheesecake. If you're in to cherries or cheesecake or maybe both then you will love these little guys. I was craving something sweet the other day so I decided to make some of these to satisfy my sweet tooth. I normally make these in a smaller size (these are the size of regular cupcakes, I typically use my mini-cupcake pan though) but was out of mini cupcake liners.


Ingredients for the filling:

2 8 ounce blocks of cream cheese
3 eggs
3/4 cup granulated sugar
1 teaspoon vanilla extract
1 capfull of lemon juice (you can use imitation or the real stuff)

Ingredients for the crust:
Half of a bag/box of vanilla wafers
A couple tablespoons of butter/margarine

Topiing:

1 Can of cherry pie filling (or whatever fruit filling you like)

Directions: (this is so easy that the kids could do it, I promise!)

Preheat your oven to 350 F. Line your cupcake pan with cupcake liners-or you could grease them if you don't have any liners. Put the vanilla wafers and the butter in the food processor. Turn it on medium for 30 seconds-1 minute or long enough to get a crumb like consistency. Take a spoonful of the crumbs and place in the bottom of the liners in your pan. Use your fingers to push everything down firmly. Set aside.

At this point I take whatever crumbs are left and put them in a resealable plastic container in the fridge for next time. Take this opportunity to wash the bowl of your food processor, you're going to need it for the next step.

Take all of the filling ingredients and put them in the bowl of the food processor. Turn it on for about 2 minutes-or until you have a creamy, thick, smooth consistency. Take a spoon and put a couple of spoonfulls on to the crusts in your pan. Put the pans in the oven for about 12 minutes depending on your oven. When they cheesecakes are done they will be a little poofy on top but not jiggly. If they're still jiggly leave them for another minute or two. Take them out and set them on a cooling rack for about 5 minutes. After 5 minutes just take them out of the pans and leave them on the rack.

When they're completely cooled put them in a storage container. Take a spoonful of your pie filling and top the cheesecakes. Now for the hardest part-put them in the fridge for a couple of hours. After a couple of hours in the fridge-they should look like this:


They are so yummy! It's very hard to only eat one or two or six at one time!!

Wednesday, July 28, 2010

Yummy Snickerdoodle Blondies

I found this recipe online a couple of weeks ago but I hadn't had the time to try it until last night. Oh my, did these blondies turn out yummy.


Here's the recipe (I adapted it a little bit to suit our tastes):

Ingredients:

2 2/3 cups All-purpose flour
2 teaspoons baking powder (although I only used about 1 1/2 teaspoon)
1 teaspoon cinnamon
1/4 teaspoon grated or ground nutmeg
1 teaspoon salt
2 cups packed brown sugar
1 cup butter at room temperature
2 eggs room temperature
1 tablespoon vanilla extract

For the topping:
2 tablespoons granulated sugar
2 teaspoons cinnamon
a pinch of nutmeg

Directions:

1. Preheat oven to 350 degrees F. Lightly grease and/of line a 9x13 inch pan. Combine the flour, baking poweder, cinnamon, nutmeg and salt and set aside.
2. In large bowl, beat together butter and brown sugar for 3-5 minutes. Add in the eggs ones at a time, then the vanilla and beat until smooth.
3. Stir in the flour mixture until well blended. Spread evenly in prepared pan. Combine the granulated sugar, cinnamon and nutmeg in a small bowl. Evenly sprinkle cinnamon sugar mixture over the top of the batter.
4. Bake 25-30 minutes or until surface springs back when gently pressed. Cool before cutting.
I can't express how much these "blondies" taste like a snickerdoodle cookie. When I make these again when I make the topping I'm going to cut the sugar and cinnamon in half. I found that it was a little overpowering for me. I don't know how it will affect the overall taste of the blondies so I'm going to have to tweak it a little bit.
Now run, don't walk to your kitchen and get these blondies in the oven! You'll thank me, I promise.